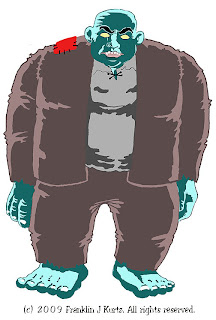
I can't help myself. I'm getting very excited at how my two as yet unnamed comic projects I'm working on are going. Okay, okay, I've given 'em names but haven't shared those with anyone... except my wife, Colette, and my daughter, Molly.
Once again, like the vampire girl piece I recently posted, I must caution that this piece of artwork is very misleading. It's also not quite done. Also, there is virtually no black on it, though the original piece was inked.
I feel I must add that this unknown fellow will have a prominent part to play in the new comic... which I'm intent on launching here very soon.
Also, a few weeks back, I showed you a color piece featuring Monster Patrol that had been originally published in Big Bang Comics in black and white. At that time, I also wrote a "How To" for the way I color my comics... which I didn't publish, because I thought I had lost it. Thank goodness, the folks here at Blogspot thought ahead and always save documents while you're working on them, without you having to do so.
So, weeks later, here's my hopefully lucid explanation on how I color comics:
I learned how to do this from my good buddy, Mark A Nelson, artist of Dark Horse Comics' first Aliens series, Epic's Feud and the Crab Boy strips that were in my Laughing Reindeer Press Creepsville series. I use Adobe Photoshop. In my instructions below, I presume that you have Photoshop and know how it operates, especially the various Windows.
How's it done? First thing I do is get a good photocopy of my artwork shrunk to fit a regular size sheet of paper. Photocopying can actually get rid of pesky pencil lines while retaining the strong inked work. I usually (but not always) scan the black and white artwork in high res (300 dpi) Bit Map, the reason being that Bit Map scans in black and white only, eliminating grays... which provides the cleanest form to color in.
Once scanned, I change the image mode to RGB. Then, bringing up the Layers window, you'll see that your scanned image is named Background. I create a Duplicate Layer, which I allow to have the default name of "Background copy." It's actually in this duplicate that I will be coloring.
Go to the Eye icon on your Background Copy and click it, which momentarily removes that scan, but does not delete it. Then, click back on Background, and go up to the command items at the top of the Photoshop window, clicking on "Select" and then pull down to "Color Range." A window will open with a mini version of your artwork. Using the eyedropper, click on a white area of the artwork and press Okay. Your scanned image will then have what Mark calls "marching ants" running around the black areas of the image. Then, select your Eraser tool and click on a white area on this piece. The area you clicked should show a checked background (white and gray). If it does, then press your computer's Delete button, and all the white will disappear, replaced by that checkered background. This creates a transparency which will retain the line art while you color below it. At this point, I save the artwork, which it will do as a PSD document (aka Photoshop), retaining the layers.
Now, back on the Layers window, click the eye on the Background copy, turning it back on, restoring the white that was erased. Now, make sure that you have the Background copy selected on the right side of the box. As a test, select the brush tool on your toolbar and make a big streak across the page. If you have selected correctly, your swipe of color should show up while the lines in front remain fully intact. Because you're not going to keep it that way, you can do a Ctrl-Z to remove your test... or just color over it as you do the real coloring work.
For coloring it, you will just have to experiment with the tools. See what you can do. I use the Lassoo, Magic Wand, Brush, Gradient and Eyedropper quite a bit when coloring.
Once I'm finished with my piece, I go to the Layers window and Flatten Image, merging the two (or more) pieces of art (transparency and color) into one. I then save it in JPG format to save space, but I also retain the original high-res layered PSD document.
Be warned: if you convert the artwork to CMYK format to save, it can make drastic changes in the way your colors come out. To avoid this, you could start coloring the project using CMYK or Lab Color. Usually CMYK format (or EPS) is used for printed materials. JPG is best for digital media, like the Internet or CD-ROM.
Good luck! I find that I enjoy doing the coloring almost as much as the original artwork. It's a different challenge and, when finished, very rewarding.


